Sometimes I truly wish I lived in the good old days of bonnets and horse-drawn wagons and family farms. I'm grateful for the luxuries we have today, but man, food made the good old fashioned way always tastes SO much better! This butter is no exception.
Sure, if you blindfolded me and gave me store-bought butter and homemade butter, I might not be able to tell the difference. BUT, when you know it's something you've made yourself, and it's slathered on fresh-baked bread, it ends up tasting heavenly. :)
Making homemade butter nowadays, unless you have your own farm animals, is actually not very cost efficient. During a good sale with a coupon, I can get a pound real butter for less than $2. On a good sale with a coupon, I can get enough whipping cream to make one pound of butter for probably around $7-8 dollars. (I would say this quart of whipping cream will make about 1 cup of butter, and this quart cost $3.50.) Of course, when making homemade butter, you get the added benefit of "old-fashioned" buttermilk, which you can't find in the stores. So there!
Butter and Buttermilk
All you need is one thing:
Whipping Cream
(Forgive the pictures. I just got a new camera and have no idea how to use it. Lol)
There are a couple of different ways to make butter at home and I will show you two of them. The first is the regular shaking method. Grab your container and add some cream. Doesn't matter how much. Just leave the container about half empty.
Screw that lid on tight and SHAKE. I will tell you, this can be tiring. I was shaking this jar for just about 10 minutes. Talk about keeping up with all those fitness-related new years resolutions.
After about 5 minutes, it will get to the point where you feel like you just can't possibly shake it anymore because it is so THICK. But, you must press on. If you need to slam the jar against a pillow or couch cushion, so be it. After another 5 minutes, you will suddenly hear some sloshing going on and when you open it up. . .
BUTTER!
Go ahead and dump all that stuff through a strainer over some kind of bowl or something. I've got cheesecloth here (I was trying something new) but it isn't necessary. Any fine mesh strainer works fine. I'll get to what to do with the butter later. . .
Here is the second method. It takes just about as much time, but can be a little messier in my opinion. Pour some cream into a bowl and then take your electric beater to it.
After like, 3 minutes maybe, it will turn into whipped cream! However, you need to keep going. It may seem like you are blending forever and that butter will never emerge. But trust me. IT WILL.
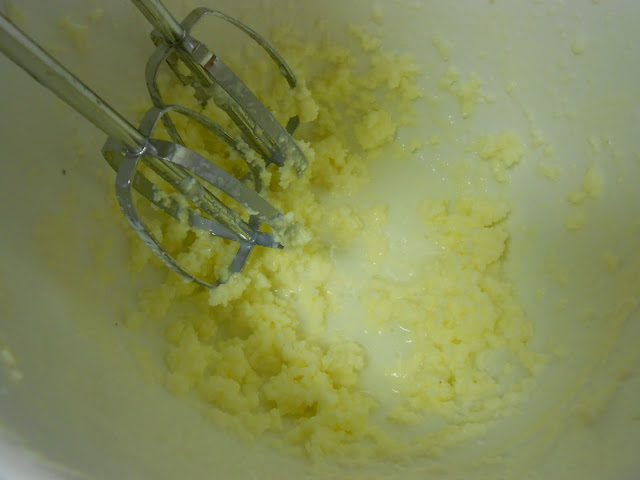
At the end, you'll start to see a bunch of liquid and little yellow chunks.
Turn the bowl on an angle, grab a spoon or spatula, and press as much liquid out of the butter as you can. This liquid is the butter milk! You will need to do this same thing with the butter that we shook up. Get out as much as you possibly can. The more buttermilk left in the butter the faster it will spoil.
Add your finished butter to some kind of container and you are ready to go! You can eat it right now if you like! Use this just as you would store-bought butter, of course.
I also poured my buttermilk into a little jar. Use this stuff for buttermilk pancakes, biscuits, etc. . . It's sweeter and thinner than the store bought stuff, and tastier. :)
From what I know, this butter has the same shelf life as any store-bought butter. I'm not sure about the buttermilk though. To be safe, I would use it within a week. :)


No comments:
Post a Comment