Sunday, April 8, 2012

Freezer Lunches Theme Week!!!

First of all, Happy Easter! Whether you celebrate or not, please make sure you get some ham in your tummy tonight. I love big holidays mostly because of the big food!

Now, on to the main event. I am FINALLY having another theme week!
Pregnancy sure affects my cooking/kitchen time, but I've got some energy and motivation back and I'm ready to go! However, I know this energy won't last very long once the third trimester/a newborn baby arrive and I know that quick and easy meals are going to be a life-saver! I'm prepping now for those days ahead, and thus, this next week's theme: Freezer Lunches!

You hear a lot about making dinners and even breakfasts to keep in the freezer for easy reheating for the family, but what about lunch? I think my worst time of day for eating is lunchtime, because I find it so easy to grab a bag of chips or an ice cream sandwich top ramen rather than actually make a lunch. Life is just too busy! Not to mention my complete lack of making lunches for my hubs to take to work. :(
But no longer! Come along with me this week as I share with you easy, quick, lunch-portion sized foods that are just perfect for grabbing from the freezer, heating up, and enjoying a scrumptious meal in the middle of the day.

*Warning: We like pizza around. You will see. . . *

Monday: Mini Bagel Pizzas

Tuesday: PB&J "Uncrustables"

Wednesday: Bean and Cheese AND Steak and Cheese Burritos

Thursday: Ham and Cheese AND Pizza  Pockets

Friday: Pizza "Lunchables"

Wednesday, March 28, 2012

Honey Whole Wheat Rolls

Honey Whole Wheat Rolls. . . Honey whole wheat rolls. . . I really don't know what to say about these. They are just. . . good! I know when people think of wheat rolls, they imagine the dense, bland kind you can find at most grocery stores, but these are NOT dense and they are NOT bland. I will say they are healthy, but healthy doesn't mean you have to sacrifice on taste! I've made these multiple times for potlucks, church get-togethers, and family dinners and they are always a hit. People are amazed that whole wheat rolls can actually taste good!
With Easter coming up, why don't you give these a shot to compliment your ham and tatoes. :)

Honey Whole Wheat Rolls
Dear author of this recipe, you rock!

Ingredients:
4 1/2 tsp Active Dry Yeast (or two of those costly little bags)
1 Cup Warm Water, 110-115 degrees
1/4 Cup Butter, melted
1/4 Honey
1 Egg
3/4 Cup Whole Wheat Flour
1/2 Cup Old Fashioned Oats
1 tsp Salt
2 1/4-2 3/4 Cups of All-Purpose Flour (You can also substitute Bread Flour and add an extra 1/8 Cup of water, but I was out of bread flour yesterday)

-Yeast and water not really pictured because they are working their magic in my mixing bowl right there in the picture.
 Dissolve the yeast in your mixing bowl. After 10 minutes it should look foamy and bubbly.
Now add everything else to the yeast! Well, not quite. Only add 1 cup of the all-purpose flour at first. Also, make sure your melted butter is cooled down. If it's too hot from being melted, it could kill the yeast! Oh no!
Slowly add another cup of flour until you get some big chunks sticking together, like this.
Now you can transfer your dough to a nice floured area. Keep about 3/4 cup of flour handy, like in my measuring cup in the picture. :)
Knead that sucker! Slowly add more flour until it's not too sticky anymore, or what the original recipe calls "smooth and elastic." This should take about 6-8 minutes. You probably won't use all of the flour. Try not to skimp on the kneading. When you knead, it helps the gluten develop and will make your rolls fluffier!
Once you have a beautiful ball of dough, set it in a greased bowl and cover to rise for about an hour.
After an hour, punch down the dough and divide it up into your rolls. You can probably stretch this dough out to make 15-18 rolls, but I usually just stick with 12. Place them in a greased 9x13 pan and cover. Let them rise at least 45 minutes. In all honestly, we unexpectedly had to go somewhere at the exact time that the 45 minutes were up, so I let these suckers rise for an entire hour extra while we were gone. And no harm was done. :)
15 minutes before they are done rising, start pre-heating your oven to 375. Then you can put them in for 20 minutes. or 18 minutes if you like your rolls a little underdone. ;)
 Take em out. Mmmmmm!!!! Let them cool for about 5 minutes and then serve!
We like just about all bread products to be smothered in butter in this house, but eating them plain works fabulous as well!


Extra notes: Don't you just love that there is NO sugar in this recipe?! I love that! Not to mention the whole wheat flour and oats. :D

Monday, March 5, 2012

Guest Post: Pepper Poppers

So, i've been a bit MIA lately, obviously. While I have many pregnancy-related excuses for my lack of blogging, I have now entered the second trimester and hope to get back onto the cooking train REALLY soon. In the meantime, my amazingly awesome oldest sister has graciously offered up a guest post for today! Pretty sweet, right?

Here goes!

Post submitted by LM Long
Pepper Poppers

This recipe came from loving the idea of Jalapeno Poppers, more than Jalapeno Poppers themselves.  I searched the internet for an easy way to do Jalapeno Poppers without having to heat up a big old vat of oil, and this little beauty of a recipe popped up.  I did some needed adjustments to my own personal taste (who doesn't love bacon), and voila! A Pepper Popper that's much more delicious than the greasy things you get at restaurants.

Preheat the oven to 400 degrees, line a cookie sheet with foil and spray with Pam.

What you'll need:
1 8oz thing of room temperature cream cheese (sorry not pictured, pop it in the microwave for twenty seconds to get it to room temp quickly *make sure to remove foil first)
3-5 strips of bacon (depending on how much you love bacon) or even easier, 1/4 cup of bacon bits
1/4 cup of your favorite shredded cheese (I use a mozzarella blend)
a couple of stale slices of bread
1/4 cup of powdered parmesan cheese
and some of your favorite seasoning mix (I'm using a garlic bread mix, but italian or taco seasoning will do)
and the best part. . . .
1 plastic tub or bag of multi colored peppers (find them in the produce aisle)
 
 First rinse your peppers and slice them in half.
You're trying to create little pockets of love.  After they're all sliced and lined neatly on your cookie sheet, we're going to create the mix.  Now if you're not using bacon bits (I never do), just pop your bacon in the microwave between some paper towels and zap it for a few minutes.  Throw the crispy strips in a blender or small food processor and pulse until nice and crumbly. Mix those bacon bits with your cream cheese, shredded cheese, and seasoning mix.
Put the mix to the side and let's make the bread crumbs.  I'm going to step on a pedestal for a minute. Please, PLEASE never buy store bread crumbs.  They are gross, people.  Homemade bread crumbs take seconds, and are so much more delicious. Stepping down now.  Throw your stale bread (I use the ends of my bread that no one ever eats) and the parmesan cheese into a blender or food processor and pulse until crumbly.  That's it!  Easy bread crumbs.  
*side note, you can also use corn flakes, ritz crackers, or whatever it is YOU use for bread crumbs
 
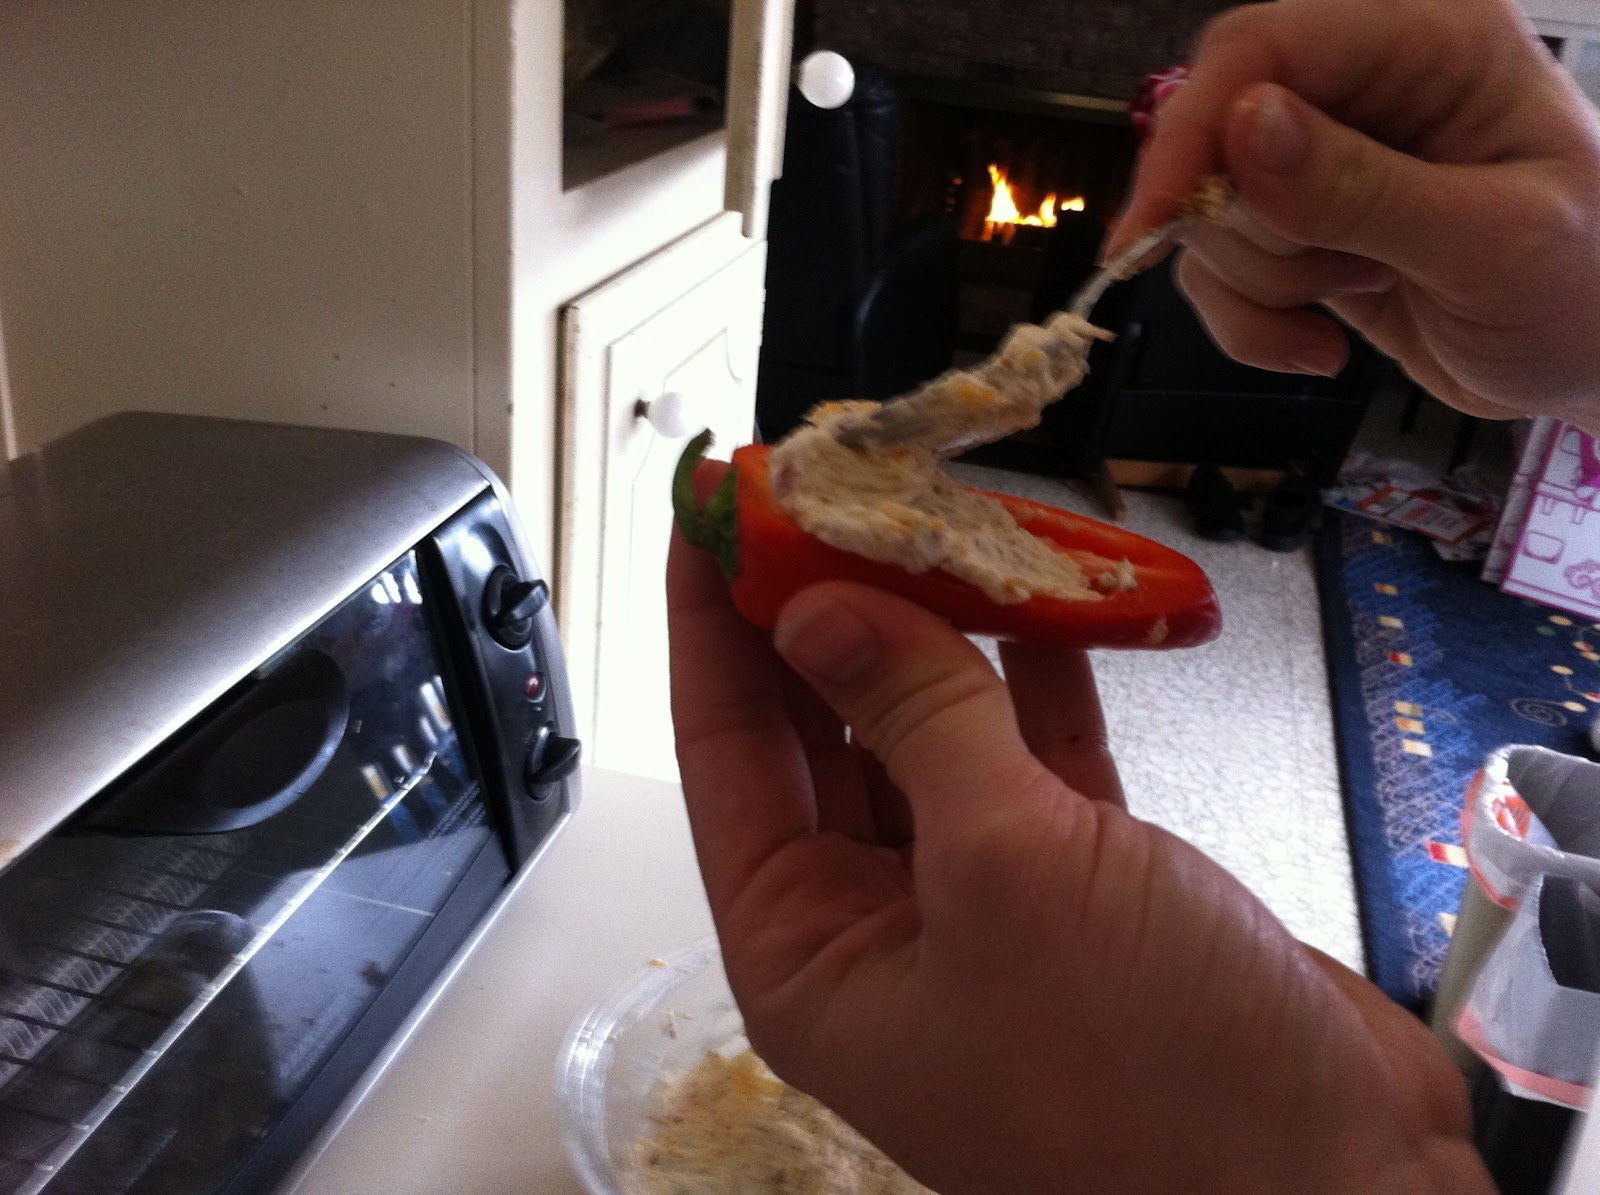
Now line up your bowls so you can stuff and then dip into the bread crumbs.  Here is me stuffing my pepper, use the back of a spoon to minimize mess.
Then you'll press the pepper, cheese side down into the breadcrumbs.
When your cookie sheet is full, you're going to stick them in your 400 degree oven for 20-25 minutes until the tops are nicely browned and your bottoms are starting to look a little withered. Let them sit for about 10 minutes, trying to resist all that gooey cheese.  
My daughter couldn't resist :) (From Kimi here, check out my adorable niece!)


Awesome, right?! I'm going to have to make these soon! I actually love jalepeno poppers, but the grease can be a bit overwhelming at times. Don't these just look much more appetizing? Thanks sis!

For more from my sister, who is an AMAZING writer, check out her website HERE! She is also the author of Founder which you should all go out and read RIGHT NOW. :)

Wednesday, February 8, 2012

Lovey-Dovey Ravioli


Oh boy, have I got a sweet lovey-dovey dinner in store for you! I must say, I think any person would feel special having this dish made just for them, especially when they find out that you handmade the ravioli pasta and the filling. Mmm!


Lovey-Dovey Ravioli
Pasta:
3 Cups Flour
2 Eggs
Drizzle of Olive Oil
Water


Filling:
Half a tub of Ricotta Cheese
A handful of Parmesan Cheese
1 Egg
A big ole handful of Fresh Spinach
Salt and Pepper
1/2 tsp Ground Nutmeg

 First, boil a pot of lightly salted water and then dump in your spinach. Cook it up until it's all wilted, only a couple minutes.
 Go ahead and drain the spinach into some cheesecloth or even a paper towel. I dumped it in and set it aside to cool off for a bit.
 Once it's cooled, squish out all the excess liquid and then chop it up nice and teeny tiny.
 Now add the rest of the filling ingredients to a small bowl.
 Mix in the spinach and set the filling aside while you make the pasta.
 Pour your flour into a large bowl and make a well in the center. Add your eggs and the olive oil into the well.
You can use a fork, or just your hands, to mix it all together. Start by slowly incorporating the flour into the eggs in the center. Just slowly bring more and more flour into the center until you can just go crazy and mix it all up.
 Now take that extra water and just add some until you have a pretty good dough consistency. I think I ended up adding about 3/4 Cup of water, but it really depends on your climate.
 Once it's come together, knead it for 5-10 minutes until it's nice and smooth.
 Grab a handful of the dough. Wrap the rest with plastic wrap and set aside.
 Now, roll it REEEEEAAAAALLLY thin! Like, as thin as you can possibly go.
Grab a heart shaped cookie cutter, or a knife if you've got mad skills, and cut out a whole bunch of hearts! Remove the excess dough and add it back to your plastic wrapped stuff.
 Now add some filling to your hearts!
Grab another heart, lay it on top (you may need to stretch it a bit to fit over the filling) and then grab a fork to crimp down all the edges.
Set your hearts aside and let them dry out for a bit. You can use this waiting time to start to boil a big pot of water.
I'm not gonna lie, making these little hearts is time consuming. I recommend only making a few hearts (I made ten) and then using the rest of the dough for plain square ravioli. You can layer your heart ones on top of the pasta bowl for the presentation, but the rest can be square. Making regular ravioli is actually REALLY easy! Roll out the dough like before, but then just form or cut it into a big rectangle. Spoon some filling right onto the big rectangle, about an inch apart. Only fill about half the rectangle. Fold the empty half over onto the filled half and then use a pizza wheel to cut out all the individual raviolis. Then use a fork to crimp the edges. Voila!
 Once they've dried for a bit, add them to salted boiling water for 4-5 minutes.
 Serve with your favorite sauce and you are good to go!
Related Posts Plugin for WordPress, Blogger...